Sunday

She who dares bakes... Dorie's Party Cake

I just love it when the fates align and for once, in an often higgledy piggledy life, things work out. This month's challenge, hosted by Morven, is Dorie Greenspan's perfect white party cake. Initially I was fazed. A whole party cake and no potential birthdays to take it to, I feared that I would end up eating the whole thing myself. Fortunately my thighs were spared the baking onslaught as I remembered that we would soon be celebrating Mr AB's parents' 30th wedding anniversary. Yes, that's 30 years of happy marriage. What an achievement!

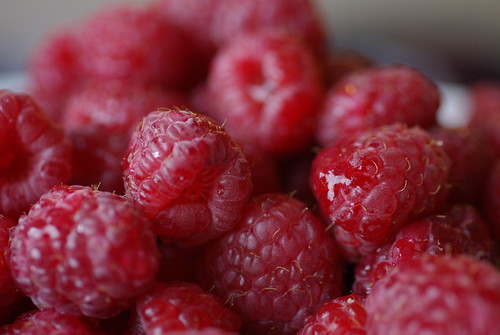
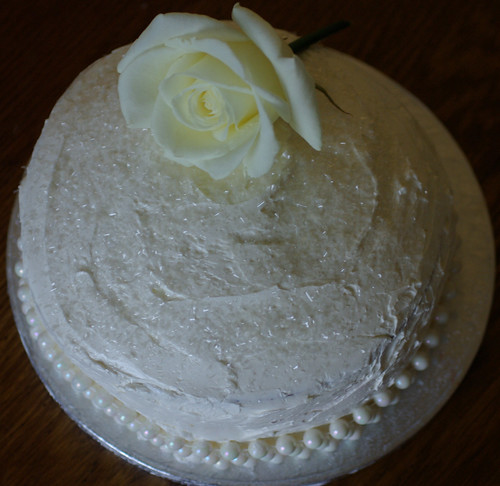
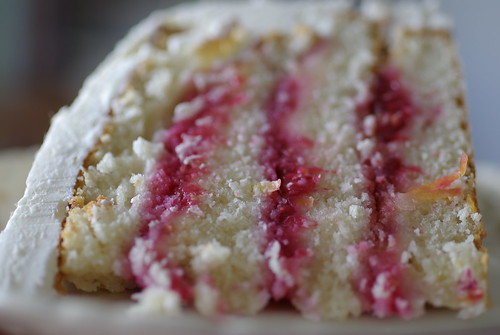
This cake is perfect for a pearl anniversary because of the bright, white icing and the light white crumb. Rules for this challenge were flexible meaning we could tinker with the fillings. In order to balance the richness of the icing, I chose to sandwich the layers with tart lemon curd and fresh raspberries. I liked the idea of the iridescent shell (helped by edible cake glitter) hiding layers of fruit inside.

I was a little concerned about the sponge after hearing reports of 'pancakes' from other Daring Bakers. The recipe uses whisked egg whites and baking powder to produce the rise and as I mixed the batter I did have a few doubts. Luckily, my great friend M has years of experience in calming my tizzes and told me to stop panicking and just put the damn things in the oven. They weren't the highest cakes I've ever seen, but I was able to complete the (very stressful) task of splitting each layer without major causalities.

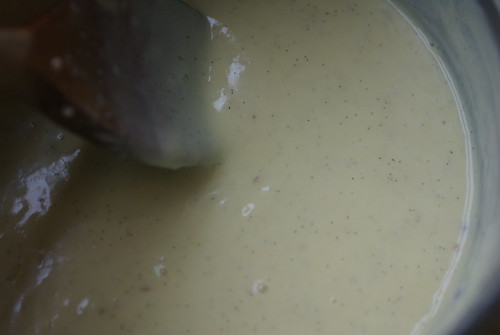
As the cakes were cooling I made a simple lemon curd to spread between the layers. I did have a bit of a curdtastrophe (haha) as it refused to set to a spreadable consistency but, calmed by M, I added some cornflour and disaster was averted. The meringue-based butter cream was easier to make than I had feared.

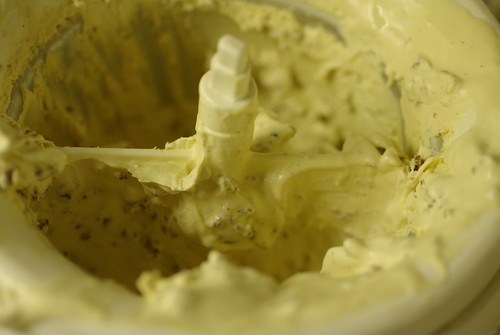
Fantastically rich, I think it could have been a bit too much in between the layers and I'm glad I replaced it with the fruit.
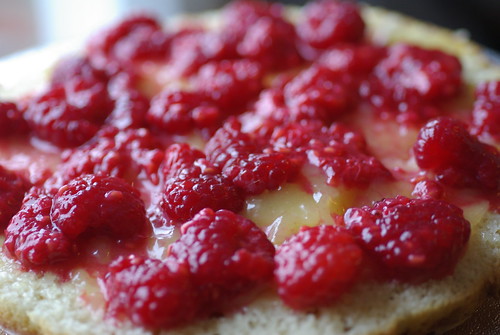
I had a few Pisaesque moments as I assembled the cake,

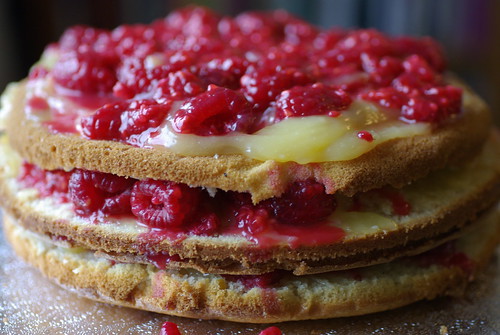
but generally it came together well and the end result was sufficiently pearl-like. I even had time to shower before leaving for the meal so, all in all it was a success. As the cake came out of Marco Pierre White's Criterion kitchen (check me out, serving food in top London restaurants) topped with a sparkler, and delivered to the happy couple I definitely felt that this party cake lived up to its name.


I'm not sure I would use this as my go-to fancy cake recipe as making the batter was a bit of a faff and a standard victoria sponge recipe would probably work as well. That said, it does look very special so, if the occasion warrants it, give it a try.


You can get the full recipe for the cake here. I used whole milk soured with lemon rather than buttermilk. Given that England hasn't woken up to the wonders of cake flour I followed Tartlette's helpful advice of removing 2 tablespoons of plain flour per cup needed and replacing it with 2 tablespoons of cornflour. I also omitted the coconut and sandwiched the cakes with lemon curd and raspberries as discussed.

View all the other marvellous creations here.

Thursday

One a penny, two a penny, hot cross buns

I think the reason that I enjoy making festive treats so much is that it marks the occasion. In our grown-up lives of work and responsibilities it's easy to forget the simple joy of a home-made advent calendar, a Valentine's Day post box or an Easter bonnet. When I make something so seasonal I feel that I'm not just letting the year pass by in a blur but I'm actually stopping to participate in it.

When I was at primary school Easter was a big deal. We made bonnets (crumpled tissue paper glued to a head band) and paraded around the assembly hall like show ponies. We decorated eggs with glitter and sequins and the day ended with the eggstavaganza (sorry) of egg rolling. Yes, every year we would hard boil eggs (usually adding vinegar to the water for its fabled strengthening properties), take them to the top of the hill in the playground and roll them down. After the eggs had been rolled we would tear across the grass, dodging the debris and laughing at those who had forgotten to boil their weapon. The aim was to throw your egg the furthest without it exploding in a flurry of yolk and shell. Ah, those were the days.

Unfortunately, there's no egg rolling for me this year but I have made Hot Cross Buns. At the moment these sweet little buns are available everywhere but I'm never normally tempted. The ones in the shops always look so dry. The other day I poked one in Sainsbury's and it didn't yield a millimetre. Firm and taut is all well and good for a Supermodel's thigh, but when it comes to buns you want soft and giving.

These treats are really simple to make and since most of the preparation time is leaving the yeast to do its thing you're not tied to cooker. Full of fruit and scented with spice they are delicious fresh from the oven or toasted and spread with butter over the next few days.

Hot Cross Buns
(makes 12 large buns)

25g fresh yeast or 15g dried yeast
50g caster sugar
150ml tepid water (1 part boiling and 2 parts cold)
450g strong white bread making flour
1 tsp salt
1/2 tsp ground cinnamon
1 heaped tsp mixed spice
1/2 grated nutmeg (optional)
50g butter
200g mixed sultanas, currants and mixed peel
grated rind of an orange
warm milk and 1 beaten egg to make up 140ml
4 tablespoons of milk boiled with 2 tablespoons of sugar to glaze.
110g plain flour, 25g caster sugar and water to make a paste for the crosses.

  1. Cream the fresh yeast with 1 teaspoon of the sugar and dissolve in the water. If using dried yeast follow the instructions given on the packet.

  2. Sift into a large bowl the flour, salt and spices.

  3. Rub the butter into the flour as if you were making pastry.

  4. Mix in the rest of the sugar and the dried fruit. Make sure you break up any clumps of fruit before adding.

  5. Make a well in the centre of the dry ingredients and add the yeast and the egg/milk mixture.

  6. Combine the mixture into a dough with a wooden spoon and then your hands. The dough should be pliable but not overly sticky. Add a little more warm milk or flour as appropriate.


  7. Knead the dough for around 6 minutes until it is smooth and elastic in texture. Some of the fruit may want to pop out as you do this. Simply push it back in to the dough again.

  8. Leave the dough to rest as you wash the bowl and lightly grease it. Put the ball of dough back into the bowl, cover with cling film and a clean tea towel and leave to rise somewhere warm. Because this is an enriched dough it rises more slowly than normal bread, therefore somewhere warm like an airing cupboard or in a warmed oven with the light on will help the dough rise. Leave it until it has doubled in size (about 1 hour).

  9. Once the dough has risen, turn the it onto a floured board and knead it smooth again. Pinch out any large air bubbles.

  10. Shape the dough into buns (remember that it will spread so don't go too big like my monster buns). You can do this by rolling the dough in your hand and tucking the edges under like a cushion. Mark a cross on top of the buns using a knife. Put them on a greased baking tray.


  11. Loosely cover the buns with cling film and a tea towel and then leave them in your warm place until they have spread and become puffy (about 40 minutes).

  12. In the meantime mix the flour, water and caster sugar together to make a smooth paste. It needs to be a pipeable consistency. Fill a piping bag with a small nozzle or use a freezer bag with the corner cut out.

  13. Preheat the oven to 220 degrees and pipe a cross on your buns. Put them in the oven for 15 minutes or until golden.

  14. While the buns are in the oven, boil the milk and sugar together until it becomes syrupy.

  15. Remove the buns from the oven and put them on a cooling rack. Before they become cool, paint the syrup on top until they gleam.

If you prefer, you can make a hot cross bun loaf with this dough. Instead of dividing the mixture you just put it into a loaf tin and leave out the crosses. Cook the loaf for 10-15 minutes at 200 degrees then lower the temperature to 180 degrees for a further 25-30 minutes or until firm.

Apologies for the less than inspiring photos. I made these this evening and the light in my kitchen is a yukky yukky yellow. Booooo

Sunday

Easter Biscuits

I love that festivities and food are so intertwined. With birthdays come cake, with Christmas comes cake and with Easter comes, err, biscuits. I know many of you will be enjoying Simnel cake, hot cross buns and countless chocolate eggs (and, after my sugar-free stint, I will definitely be joining you) but ever since I can remember we've had Easter Biscuits at this time of the year.

Apparently Easter Biscuits were developed as a lighter, simpler alternative to Hot Cross Buns or Hot Cross Bums as I mistakenly typed to Mr AB the other day (now that would be an interesting recipe). These buttery little biscuits are warm with spices and packed with currants. What makes them really special is the egg white and sugar crust which tops them. Delicious.

I've seen variations of this recipe using different types of dried fruits but I like to keep things traditional. These biscuits are always made with the same recipe from my Mum's 1970s Readers Digest cook book. You can tell that these are one of Mum's favourite recipes because they're one of the few that have the calorie count worked out alongside clearly from her diligent Weight-Watchers days. That said, I've increased the amount of currants slightly and added a little grating of fresh nutmeg.

If you fancy making an Easter treat for someone or , indeed, yourself you can whip these up in 15 or so minutes and have them fresh out of the oven to enjoy. Unfortunately I didn't get to try this batch (only one week to go until I escape my sugar free prison). Instead, I wrapped them up and took them to a friend's birthday lunch. It took discipline to hand them over.

Easter Biscuits
Makes 24 biscuits

4oz butter
5oz caster sugar
2 large eggs (one separated)
3oz currants
6oz plain flour
2oz rice flour
2 teaspoons mixed spice
half a grated nutmeg (optional)
1-2 tablespoons milk
  1. Grease a couple of baking trays or line them with non-stick paper. Preheat the oven to 180 degrees.
  2. Cream the butter with a wooden spoon until soft and add 4oz of the sugar. Beat the sugar and butter until it is light, soft and fluffy.

  3. Add the whole egg and the egg yolk of the second one to the butter mixture. Beat the eggs into the sugar. Add the currants.

  4. Sift the flours together with the spices and mix them into the the creamed ingredients a little at a time. 
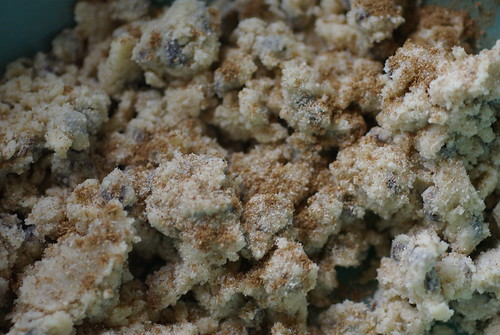
Stir to combine and add a little milk if necessary. You want a soft, pliable dough.

  5. Knead the dough lightly on a floured surface and then roll it out until it is about half a centimetre thick. 
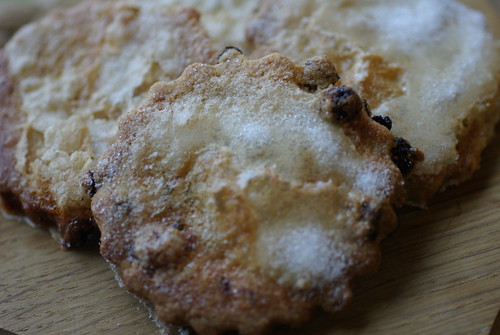
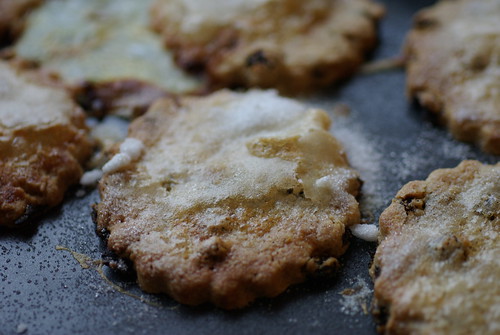
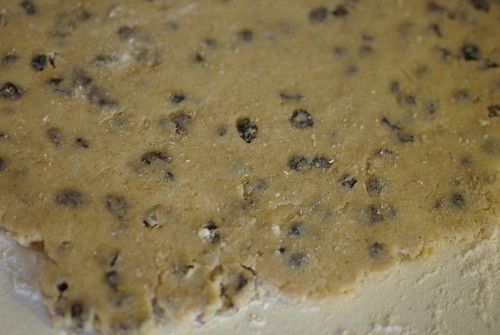
Cut your biscuits with a fluted cutter and bake in the oven for 15-20 minutes.

  6. After 10 minutes brush the biscuits with the egg white and dredge with the remaining sugar. Return to the oven until the biscuits are golden and the tops are blistered.


Friday

If you're going to the bookshop...

You know you've read an excellent book when you become a bit of a bore about it. If you're anything like me you can't shut up. Interrupting those that you live with to read out particularly interesting passages when they'd rather be watching TV, reading their own books or, perhaps, sticking their heads in ovens. I must admit that I only really do this with non-fiction, when I'm reading a great novel you can't get a peep out of me.

A really good book can turn you into an evangelical and like a true evangelical I'm going to spread the word. Michael Pollan's In Defence of Food is a must if you're interested in food, health and the relationship between the two. When I went to Waterstones to buy it I was disappointed to find it in the diet section, because if there's one thing that this book is not, it's a diet.

As you can tell from the recipes I make, I'm not someone who could be described as a health nut. I love baking and I love eating what I bake. What I don't like is the artificial pap which is marketed as food and which is pushed into the baskets of so many shoppers across the Western world. This is where my new best friend, Michael, and I converge. In Defence of Food wants people to think about what they are eating rather than handing over responsibility for a decent diet to politicians, journalists and the big corporates. As he points out, something as fundamental as feeding ourselves has become fraught with difficulty,tension and commercialisation. Rather than trusting the instincts which have been years in the evolutionary making, we now look to anyone who says they're in the know to tell us what to do. In reality this leaves us susceptible to advantage taking by anyone with a big enough budget.

The book ends with a set of guidelines that I can't help but remember every time I go shopping. Little things like not eating anything that your grandparents wouldn't recognise as food or avoiding anything that has ingredients you can't pronounce. It just makes sense.

Ok, ok rant over. Polemic aside, I can't recommend Michael's book highly enough. Not only is it refreshingly sensible it's actually very entertaining as well. Enjoy!

Tuesday

I scream, you scream, we all scream for ice-cream


I've given up chocolate, cake/puddings and biscuits for Lent. This hasn't been going too badly on a day to day basis (well, it's not exactly a joy but I suppose that's the point). The real difficulty (apart from wanting to snatch Dairy Milk out of the hands of small children) is when people come over to eat.

The problem with being a baking enthusiast is that people expect a pudding or a sweet treat when they come to see you. Caught out by your rich and decadent deserts in the past, they come to your house having been 'good all day' and ready to indulge. The thought of serving people fruit salad, however exotic or lovingly prepared, makes me feel a little tense. It brings back bad memories of the black days when school dinners ended with a yoghurt or a piece of fruit rather than something + custard. I felt disappointed and despondent for the rest of the day. I know this may well just be me, but what kind of hostess would want to take the risk of upsetting her guests in a similar fashion?

Anyway, last Saturday K and Y came round for dinner. After a spicy lentil soup and a succulent lamb tagine (more of which to come) I decided to make a very healthy baked banana for pudding. Of course, in light of the above, I had to pair it with a scoop of creamy brown bread ice-cream. I did have a few wrangles with myself about whether this would go against the spirit of the "no cakes, no biscuits, no chocolate" ruling but I managed to convince myself that ice-cream is clearly none of these things and, besides, I was serving it with fruit which would give me copious brownie (mmmmmm brownie) points. Jesus would be proud.

Brown bread ice-cream dates back to the Victorian times and is basically a beautifully creamy vanilla custard with chunks of caramelised brown bread stirred through. I first tried it when I was at university. I don't know if I had many intellectual awakenings in my first year, but this ice-cream certainly gave my taste buds a buzz. Our college used to make the most beautiful homemade ice-creams. Legend has it that they were all stored in a big cellar and, anytime they so desired, the dons could go and help themselves. I'm not sure if this is true, but had I been privy to the location of the brown bread variety I would have been there nightly, spoon and wafer in hand.

This recipe is from Nordijus' beautiful blog and it is a real winner. I decided to make a toffee sauce which I had visions of snaking through the ice-cream. In the end, it just blended into the vanilla base which, although not what I was expecting, gave a delicious toffee background for the caramelised crumbs. I saved the extra sauce to spoon over the finished article (and a little to spoon straight into my mouth).

This was my first attempt at homemade ice-cream and I am, without a doubt, a convert. I do love my premium ice-cream (B&Js especially) but home churned ice-cream is in a completely different iced-desert league. I used the Bedmate's simple ice-cream maker but if you don't have one, Nordijus also gives instructions for making the ice-cream without.

The toffee sauce recipe is a brilliant go-to sauce for any pudding (especially a toffee sponge) and the ice-cream would be an excellent accompaniment to most things. I can imagine it inside a brandy snap basket or a toffee meringue nest or alternatively just licked off your fingers standing next to the freezer (don't judge, as I said, I decided it didn't break Lent!).

Nordijus' Brown Bread Ice-cream with my Toffee Sauce
Serves 4-6

4 egg yolks (I used large eggs)
75g caster sugar
1 teaspoon cornflour
1/2 vanilla pod
250ml milk (I used whole milk)
40g butter
80g crustless wholemeal bread (I doubled the quantity of the breadcrumbs for extra crunch. If you want to do the same you should also double the quantity of butter and brown sugar)
50g soft light brown sugar
250ml double cream
Toffee Sauce
115g butter
115g light muscovado sugar
140ml double cream
  1. Pop the bread in the food processor to make fine crumbs. Mix the brown sugar with the melted butter. 
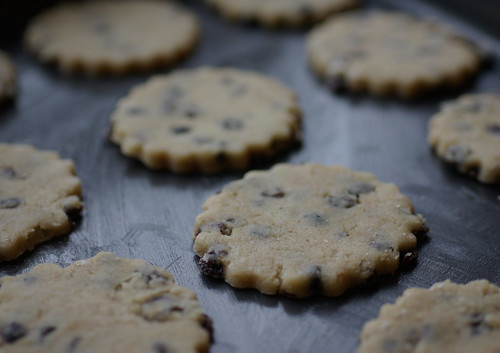
Add the crumbs, stir well and then spread the mixture on a baking sheet.


  2. Bake the crumbs in a pre-heated oven at 180 centigrade for 15-20 minutes, turning from time to time until they are toasted and crisp. Be careful to keep an eye on them at this stage as they burn quite easily. Allow to cool and try to resist eating them all.

  3. Cut the vanilla pod open and scrape out the seeds with a knife or your fingernail.
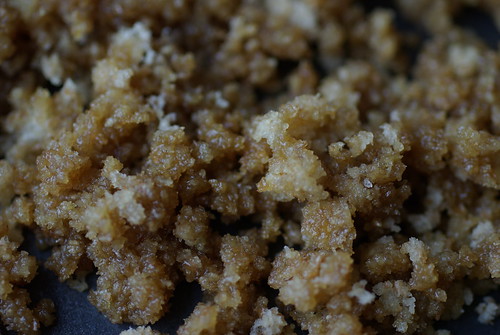
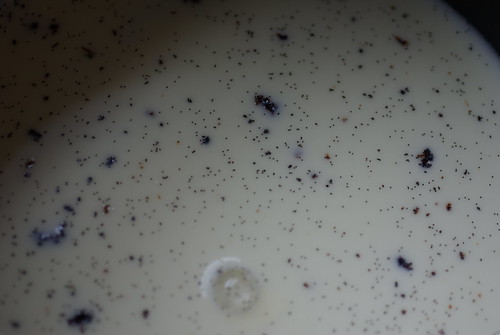
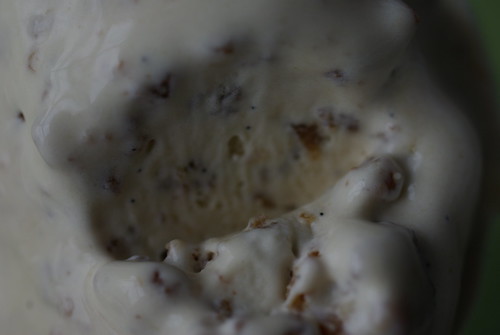
Pour the milk into a heavy-based saucepan, add the vanilla pod and seeds and bring to the boil. Remove from the heat and leave for 15 minutes to allow the flavours to infuse.
  4. Whisk the egg yolks, sugar and cornflour in a bowl until thick and pale. Gradually pour on the hot milk, whisking constantly. Return the mixture to the pan and cook over a gentle heat, stirring all the time. Do not allow the custard to catch on the base of the pan. When the custard thickens and coats the back of the spoon it is ready. Strain out the pod (the pod can be washed and dried and used to scent sugar).
  5. While the custard cools you can make your toffee sauce. Put the butter, sugar and cream into a saucepan and heat gently until the sauce has thickened and darkened in colour (dangerously easy).

  6. When you are ready to churn the ice-cream add your crumbs to the custard (you may need to break any big clumps with your fingers) and add as much or as little toffee sauce as you want.

  7. Churn the mixture in your machine (or make by hand) until it is thick (about 10-15 minutes). Store it in the freezer but allow it to soften before serving.